
It’s a lazy midsummer Saturday. The sun’s throwing gold across the yard, your favorite playlist hums from the porch, and the smoker’s gentle crackle feels like background music for a perfect cook. You’ve trimmed the brisket, rubbed it down, and settled back in a lawn chair with a cold drink—this is why you love barbecue season.
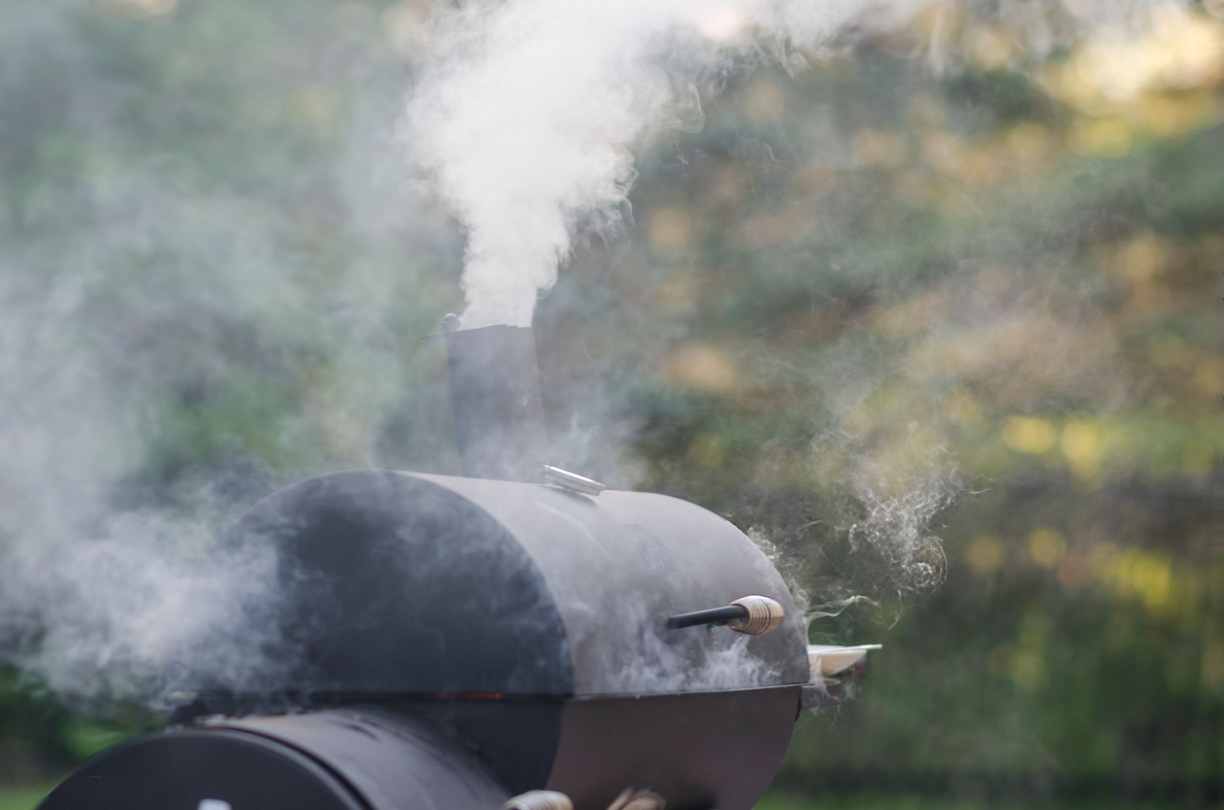
Then that tell-tale puff rises from the stack—chalky, thick, white smoke. You try to laugh it off, but deep down you know what’s coming: a gorgeous-looking bark that tastes like a campfire ashtray. I’ve been in your flip-flops, and nothing ruins a summer cook faster.
Here’s the good news: chasing that almost invisible, clean blue smoke isn’t voodoo or blind luck. It’s straightforward combustion chemistry barbecue—a mix of wood gases, heat, and airflow you can master once you see how the pieces fit. Stick with me and you’ll learn to read your fire the way pit crews read spark plugs, so every bite feels like the Fourth of July fireworks finale—minus the soot.
Ready? Grab your tongs, and let’s flip the script on bitter bark before the ice in your glass even melts.
Blue Smoke 101: Why That Almost Invisible Haze Wins
The Molecules That Matter
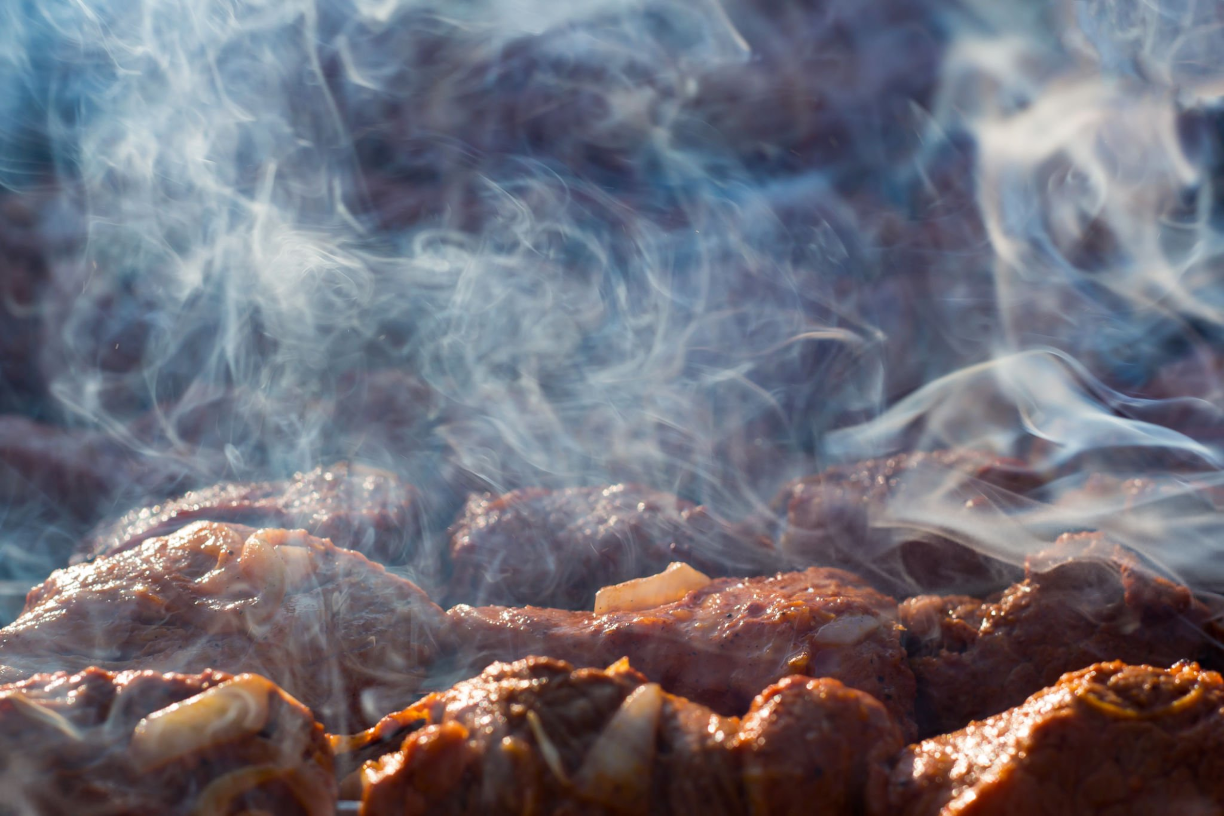
Look closely at a well-run stack and you’ll see almost nothing—just a wispy hint of clean blue smoke curling into the summer sky. That ghost-thin plume is loaded with two hero aromas, syringol and guaiacol, microscopic compounds created when wood hits its optimal smoking temperature of about 320–356 °F (160–180 °C). At this heat, lignin and cellulose break apart in a process chemists call pyrolysis, releasing flavor gases instead of sooty tar.
Those flavor molecules hitch a ride on invisible water vapor and glide over your brisket; a gentle temperature gradient then pulls them deep into the bark—a phenomenon known as thermophoresis. Because the particles are so small, they season the meat without clogging its pores or leaving a bitter film. That’s why seasoned pitmasters—and now you—chase this barely-there haze. For a deeper primer on the chemistry, skim Dr. Jean-François’s overview of combustion chemistry in barbecue the next time you’re browsing.
Pro tip: Keep your fire breathing; unrestricted airflow supplies enough oxygen for complete combustion, turning dense plumes into the “blue ribbon” you want. When you see white smoke, you’re actually watching unburned fuel—creosote, ash, and moisture—that will taste ashy on the plate.
Blue vs. White Smoke at a Glance
| Trait | Thin Blue Smoke | Thick White Smoke |
|---|---|---|
| Particle size | Microscopic flavor gases (syringol, guaiacol) | Large creosote droplets & ash |
| Visual cue | Almost invisible, slight bluish tint | Opaque, chalk-white billow |
| Burn condition | Hot, well-ventilated fire (combustion chemistry barbecue) | Smoldering, oxygen-starved fire |
| Taste impact | Clean, sweet, campfire-kissed finish | Bitter, tongue-numbing, sooty |
| Best practice | Maintain steady draft; add small seasoned chunks | Open vents, raise heat, or remove fuel fast |
If you’re still seeing white haze after ten minutes, glance at Destination BBQ’s blue-smoke glossary or the plain-language explainer at BBQ Dictionary for quick troubleshooting tips. Nail the draft, and your next rack of ribs will taste like they came from a championship trailer—not the burn barrel.
White Smoke & the Creosote Culprit
How Creosote Sneaks In
When your fire burns cool or choked, wood gases can’t finish their combustion chemistry barbecue dance. Instead, they condense into a thick, oily mix called creosote—the main villain behind harsh white smoke and that tongue-numbing after-taste . Creosote molecules are big and sticky, so they slap onto the bark instead of drifting in like the tiny flavor vapors that make clean blue smoke so lovable.
Want proof your stack is on the wrong track? Hold a clear glass of ice water above the exhaust for one minute. Black flecks on the rim mean creosote is raining down. You’ll find the full method in this neat ice-water glass test—give it a try before the next cook. A quick taste check works, too: if that first slice makes your lips tingle, hit pause and fix the fire.
Why creosote forms:
- Poor airflow. Closed or clogged vents let smoke stagnate instead of flowing past the meat.
- Over-fueling. Packing the firebox with logs smothers the coals and drops temperature.
- Dirty cook chamber. Old grease and soot act like kindling for new creosote layers.
- Wet or oversized wood. Moisture steals heat; big splits struggle to ignite, creating billows instead of haze.
Cleanup & Prevention
Think of creosote as plaque for your pit—remove it early and it never gets a foothold.
- Scrub and vacuum after every long cook. A clean interior fosters steady draft.
- Build a hot coal bed first. Fifteen minutes of glowing lump gives new chunks an instant, clean burn.
- Feed small seasoned chunks. Add one piece, wait for it to turn almost invisible, then add another.
- Match vents, don’t mash them. Start with the intake about twice the exhaust opening to pull fresh air through the firebox; fine-tune from there.
- Watch the stack, not the clock. The moment smoke shifts from chalky to a faint bluish wisp, you’re back in the flavor zone. For extra guidance, Malcom Reed’s guide on achieving thin blue smoke is gold.
Quick win: Next time your plume turns ghost-white, crack the firebox door a half-inch and wait thirty seconds. If the smoke thins and edges blue, you’ve nailed the airflow sweet spot—lock it in and let the meat breathe.
Master these habits and “blue smoke smoking meat” becomes second nature, giving you sweet bark every summer weekend without the bitter surprises.
Fire Management Foundations
Mastering thin blue smoke starts long before you set the brisket on the rack—it begins with how you build, feed, and breathe your fire. Treat this section as your pit-side checklist.
Build a Hot Coal Base
Think of your coal bed as the engine that drives clean blue smoke. Dump a chimney of natural lump charcoal, spread it out, and let it rage for 15–20 minutes—you want almost no visible smoke before wood ever touches flame. That high, even heat guarantees the wood will jump straight into efficient pyrolysis instead of a lazy smolder .
Your quick steps:
- Light a full chimney and wait until 70 % of the coals glow orange.
- Spread evenly across the firebox floor; close the lid with both vents wide-open.
- Watch the stack. When the heavy white wisps fade to near-invisible, you’ve hit the optimal smoking temperature for clean combustion.
Airflow Dial-In
A hot base is useless without oxygen. The science is simple: fast-moving air = hotter fire = fewer creosote particles. Aim for an intake area roughly twice the exhaust opening—that pressure differential sucks fresh air through the fire and sweeps spent gases out of the cook chamber .
Pro move: make big temperature changes with the intake, and fine-tune with the exhaust. Different smoker styles need tweaks—offsets like big gulps of air, while a kamado hums with the bottom vent just a finger’s width open and the daisy wheel doing the finesse work .
Smart Wood Selection
The wrong log at the wrong time is a creosote trap. Use seasoned chunks—fruit woods for mellow sweetness, hickory or oak in smaller doses for depth . Skip soaking; added moisture drags firebox temps down and prolongs that dreaded white billow .
| Wood | Flavor Punch | Best For | Add-On Tip |
|---|---|---|---|
| Apple | Light, mildly sweet | Poultry, ribs | Pairs well with a late oak chunk |
| Cherry | Sweet, rosy bark color | Pork, turkey | Great first-hour smoke |
| Oak | Medium, classic BBQ | Brisket, beef ribs | Use sparingly after bark sets |
| Hickory | Strong, bacon-like | Shoulder, bold beef | One chunk per hour max |
| Pecan | Nutty, medium-mild | All-purpose | Blends softly with fruit woods |
Rapid Visual Test
Still seeing thick white in the stack after adding wood? Crack the firebox door ½ inch; if the plume shifts blue within 30 seconds, you’ve freed the airflow chokehold. No change? Pull a chunk, open the intake another notch, and let the fire roar back to the right side of combustion chemistry barbecue.
Master these fundamentals and you’ll cruise at a steady 250 °F cook chamber, 350 °F firebox—the sweet zone where flavor molecules form and harsh tars disappear . Next up, we’ll layer on advanced temperature zones and gadget upgrades to keep that blue ribbon smoke rolling all day.
Advanced Controls: Two-Zone Strategy
You’ve got your coal bed blazing and the vents humming. Now it’s time to finesse the zones that turn “pretty good” into competition-ready. Think of your smoker like a classic muscle car: the firebox is the roaring engine, and the cook chamber is the smooth ride where the magic happens.
Temperature “Goldilocks” Zones
Why two zones? A hotter firebox burns wood completely and cranks out that barely visible haze, while a gentler cook chamber pampers the meat. Dial it in like this:
- Firebox: 300–400 °F (149–204 °C). At this range, wood gases finish the combustion chemistry barbecue cycle, leaving only thin blue smoke.
- Cook chamber: 225–275 °F (107–135 °C). Low enough for collagen to melt, steady enough to hold an optimal smoking temperature without flare-ups.
Need extra insurance? Slip a shallow water pan between zones. The added humidity helps those flavor vapors cling to the bark and evens out temperature swings.
Quick gauge check: A multi-probe digital thermometer—like the ThermoWorks RFX 4-Probe—lets you watch both zones (and the meat) without lifting the lid.
Smoke Timing & Layering
Meat is a flavor sponge early in the cook, and a flavor shield later on. Use that to your advantage:
- The “smoke window.” During the first 3–4 hours—or until the meat hits 140 °F internal—keep feeding seasoned chunks so the stack whispers blue.
- Back off the wood. After the window closes, let the coals handle the heat. Too much fresh wood now risks over-smoking even if your plume stays blue.
- Layer flavors. Start with mild fruit woods (apple, cherry) for sweet top notes, then toss in a small oak or hickory chunk midway for depth. This staggered approach builds complexity without bitterness.
Pro Tweaks
- Raise firebox temp 25 °F on humid days to chase away moisture-laden white smoke.
- Crack the exhaust wider when the wind dies to keep draft moving.
- Digital alarms save your brisket while you mow the lawn—set high/low alerts for both zones so surprises stay in the yard, not the smoker.
Lock down these two-zone habits and you’ll cruise in the sweet spot where clean blue smoke meets melt-in-your-mouth bark—no guesswork, no gritty aftertaste.
Gear That Makes Life Easier (Picks You’ll Actually Use)
You can finesse clean blue smoke with skill alone, but the right tools shrink the learning curve and free up your Saturdays for sipping iced tea instead of hovering over the vents. Below are the three gear buckets I reach for first—each backed by combustion chemistry barbecue science and years of backyard reps.
1. Precision Monitoring Tools
- ThermoWorks RFX 4-Probe Thermometer – Four probes track the firebox, cook chamber, and two meats at once, so you can keep both zones in their optimal smoking temperature lanes without lifting the lid. Multiple-probe systems are a pro’s shortcut to steady draft and thin plumes .
- Inkbird IBT-4XS Bluetooth Thermometer – Budget-friendly backup that still lets you watch temps from the hammock.
Warm tip: Set a high alarm 25 °F above target. If it beeps, you’ll know a log has caught too hot before the stack turns chalk-white.
2. Airflow Enhancers
- BBQ Guru Viper Intake Damper – Swaps onto most offset or drum smokers and gives you fine-thread control over incoming O₂. After-market dampers and small assist fans keep smoke moving so creosote never settles .
- High-flow exhaust cap – Optional, but a quick bolt-on for smokers that feel “breathless.”
- For a deeper explanation of vent mechanics (minus the guesswork), skim the Kamado Joe airflow guide on controlled temperature—great visuals even if you cook on steel instead of ceramic.
3. Fire Management Helpers
- Kick Ash Basket – A perforated charcoal basket that keeps coals centered and ash falling away, making blue smoke smoking meat far easier .
- Adjustable ash tool & mini rake – Clears spent coals fast so fresh wood lights clean.
- Water pan / drip tray combo – Adds humidity and buffers temp spikes; recommended in research on controlling creosote and maintaining optimal zones .
Quick Checklist: Gear + Gains
| Gear | Problem Solved | Flavor Payoff |
|---|---|---|
| Multi-probe thermometer | Zone temps drift | Steady smoke ring science conditions |
| Intake damper upgrade | Stagnant white smoke | Faster transition to blue haze |
| Charcoal basket | Uneven coal bed | Longer burns, fewer bitter bursts |
Bottom line: Good tools won’t replace smart firecraft, but they will let you focus on the fun parts—chatting with friends and tasting ribs—while the hardware keeps the stack whispering that invisible blue ribbon of flavor. Grab what fits your rig, and you’ll cut the slog out of perfecting your next cook.
Your 7-Step Blue Smoke Blueprint
Print these steps, tape them to the inside lid of your smoker, and watch that fluffy white cloud melt into the invisible haze every pitmaster loves.
- Pre-heat with purpose
Fire up a full chimney of lump charcoal and let it roll until you see nothing but shimmering heat—no wisps, no steam. This blast of clean energy rockets the firebox to the optimal smoking temperature range where clean blue smoke starts.
Anchor-text image: [infographic of the 7-step blueprint pinned on a smoker lid]
- Vent wide, then dial back
With the grate off-heat, fling both intake and exhaust wide open for the first ten minutes. Fresh O₂ finishes any leftover moisture burn-off and sends ash sailing. Once the stack looks empty, trim the intake to roughly 50 % and leave the exhaust nearly wide to keep draft strong—a proven combo in combustion chemistry barbecue field studies.
- Lay your wood like seasoning, not firewood
Add one small, seasoned chunk (roughly the size of your fist). Wait two minutes; if the plume stays invisible, you’re golden. If it flashes white, open the intake a sliver until it edges blue again. Resist the urge to dump a second chunk—remember, thin layers of smoke build flavor, thick bursts build creosote.
- Stabilize the chamber
Close the cooker and let temps settle: 225–275 °F in the cook chamber, 300–400 °F in the firebox. A multi-probe thermometer keeps each zone honest so you don’t have to hover. ThermoWorks RFX beeps if either wanders.
- Add the meat only when the stack whispers
Slide your brisket or ribs on after the smoke shifts from chalky to that faint tint of blue. Rushing this step is the fastest route to bitter bark.
- Feed wood on a clock—or the color
Check the stack every 45–60 minutes. If it’s faded to hot, clear air, slip in one more chunk; if you still see a blue wisp, ride it out. Blue smoke smoking meat is like seasoning soup—add a pinch, taste, wait.
- Coast to the finish on clean heat
Once internal meat temp hits 140 °F, the bark’s chemistry is mostly set. Ease back on wood, burn charcoal for heat, and let the magic compounds you’ve already deposited do the heavy lifting. As a bonus, this cut-back reduces fuel costs by 20 – 30 % per cook.
Quick-fire recap
- Start hot. White vapor can’t form if moisture and tars burn off early.
- Vent smart. Big moves on the intake, micro-moves on the exhaust.
- Chunk, pause, watch. One piece of wood at a time keeps chemistry sweet.
- Ride the blue wave. If the plume turns ghost-white, crack the firebox or pull wood fast.
Follow this blueprint once and you’ll taste the difference; follow it every weekend and you’ll wonder how you ever choked down anything else.
Troubleshooting & Weather Hacks
Even with that seven-step plan taped to your lid, Mother Nature loves to test your pit-craft. Here’s how to tame the elements—and any oddball smoke signals—before they mess with your barbecue bragging rights.
Humidity Havoc 🤒
Moist summer air slows evaporation and snuffs firebox heat, letting white haze linger. Raise your firebox temp ~25 °F and crack the exhaust an extra finger-width to keep draft cruising. If the stack still looks milky after a minute, add a dry lump of charcoal (not wood); the quick burst of heat clears steam without piling on fresh smoke.
I keep a small coffee can of lump on standby—one scoop fixes humid-day blues faster than a box fan.
Wind-Whip Woes 🌬️
Wind gusts can back-draft smoke into the cook chamber or supercharge the fire. Point your exhaust in the same direction the wind is blowing so it acts like a turbo, not a plug. If temps spike, throttle the intake first; if they sag, shield the firebox with a folding patio chair or weld blanket instead of feeding extra fuel.
Damp or “Green” Wood 🌲💧
Wet splits steal heat for vaporizing water, so they smolder and dump creosote. Keep chunks in a mesh bag under the pit roof; if a sudden rainstorm soaks your stash, microwave a chunk for 60 seconds (medium power) to flash-off surface moisture before it meets the coals. Safety note: never nuke wood with metal bark debris attached.
Rapid-Fire Symptom Solver
| Smoke or Temp Symptom | Likely Cause | Fast Fix |
|---|---|---|
| Thick white billow 15 min after lighting | Firebox too cool, wet wood | Open intake fully, add dry lump; wait 60 s |
| Bitter taste, no visible white smoke | Creosote film built earlier | Scrape grates mid-cook, raise box temp 25 °F |
| Sudden blue→gray swings every 10 min | Wind gusts cycling draft | Rotate smoker so exhaust rides the wind |
| Cook chamber stuck at 200 °F | Ash choking coal bed | Rake coals, dump ash pan, reseat basket |
| Firebox rockets past 425 °F | Over-stoked intake | Close intake halfway, spritz coals lightly |
Quick Gear Tweaks
- Silicone door gasket on leaky lids keeps cross-winds from sucking smoke out early.
- Tel-Tru bimetal pit gauge as a backup to your digital probes—analog needles don’t lose Bluetooth in a thunderstorm.
- Heat-resistant welding blanket draped over the firebox tames cold snaps without smothering airflow.
With these weather-proof tricks in your apron pocket, you’ll keep that faint clean blue smoke curling steady—rain, shine, or rogue gust. Next up: fast-track reminders of everything you’ve learned in one bite-sized list of key takeaways.
Key Takeaways
- Start hot — a roaring charcoal bed pushes the firebox into the optimal smoking temperature zone fast, burning off moisture before it can cloud your cook.
- Feed small, seasoned chunks — one fist-size piece at a time keeps the plume in that delicate clean blue smoke sweet spot.
- Dial airflow with intention — make big moves on the intake for heat, tiny nudges on the exhaust for finesse; steady oxygen is the heartbeat of combustion chemistry barbecue.
- Run two zones — hold the firebox at 300-400 °F and the cook chamber at 225-275 °F so flavor gases form cleanly while meat relaxes.
- Watch the stack, not the clock — adjust when color shifts; thin blue means “go,” milky white means “fix me.”
- Prepare for the elements — raise temp on humid days, shield against wind, and dry damp wood to guard against creosote.
Master these six habits and you’ll nail competition-ready bark with that barely visible “blue ribbon” haze every single summer weekend.
FAQ
Why do I still get a pink smoke ring when the stack looks milky white?
The ring forms when nitric oxide in the smoke reacts with myoglobin near the meat’s surface during the first hour or so of the cook. That chemical reaction happens even if the plume is thick and white, so a pretty ring isn’t proof of great flavor. Keep chasing clean blue smoke for taste; the ring will tag along. For the nerdy breakdown, see the Smoke Ring Science primer at AmazingRibs.
Can a pellet smoker make true blue smoke?
Yes—if you treat it like a tiny stick-burner. Run the pit in Smoke or Low mode for the first couple of hours, then bump to your cooking temp. Fresh, premium pellets such as CookinPellets Perfect Mix light cleanly and stay dry in a sealed bucket, which helps the auger feed steady and keeps the exhaust a faint blue.
How often should I clean my smoker to keep creosote away?
Give the grates a quick scrape after every cook and vacuum ash once the coals die. Plan a deeper clean—scrubbing lids, walls, and the stack—about every 5–6 long cooks or once a month in peak season. A slick, soot-free surface keeps airflow smooth and stops bitter creosote from snow-balling.
Will wood chips ever beat chunks for blue smoke?
Chips ignite fast, so they’re handy in electric cabinets or on gas grills, but they burn out just as quickly. In a charcoal or stick burner, fist-size chunks win: they smolder longer, hold a steadier temp, and let you fine-tune flavor without constant feeding. If you only have chips, wrap a handful in heavy foil, poke a few holes, and lay the packet on hot coals for a slower release.
What’s a good wood-to-charcoal ratio to start with?
Aim for about 20 % wood to 80 % charcoal by weight during the “smoke window” (the first 3–4 hours). That balance supplies enough volatile gases for rich flavor while the larger charcoal load stabilizes heat and draft—your ticket to that barely visible blue haze. Adjust up or down in 5 % steps until the taste matches your style.
Conclusion & Next Moves
You’ve got the chemistry, the fire-craft, and the playbook. All that’s left is to roll the smoker onto the patio, spark a hot coal bed, and watch that stack whisper clean blue smoke while the neighborhood noses twitch. Remember:
- Hot coals first, tiny wood later.
- Steady draft beats frantic vent-flipping.
- Blue in the stack equals sweet on the plate.
Put the Blue Smoke Blueprint to work on your next rack of ribs—this weekend if you can. I promise that first bite of bark will taste like a prize check, not a chimney sweep.
Ready for the easy button? Grab the essentials I rely on every cook:
- The ThermoWorks RFX 4-Probe Thermometer for worry-free zone control.
- A Kick Ash Basket to keep coals breathing freely.
Try the blueprint, taste the difference, then let me know how it went. Now fire it up, breathe that faint blue haze, and make this summer the one your friends talk about all year. Happy smoking!